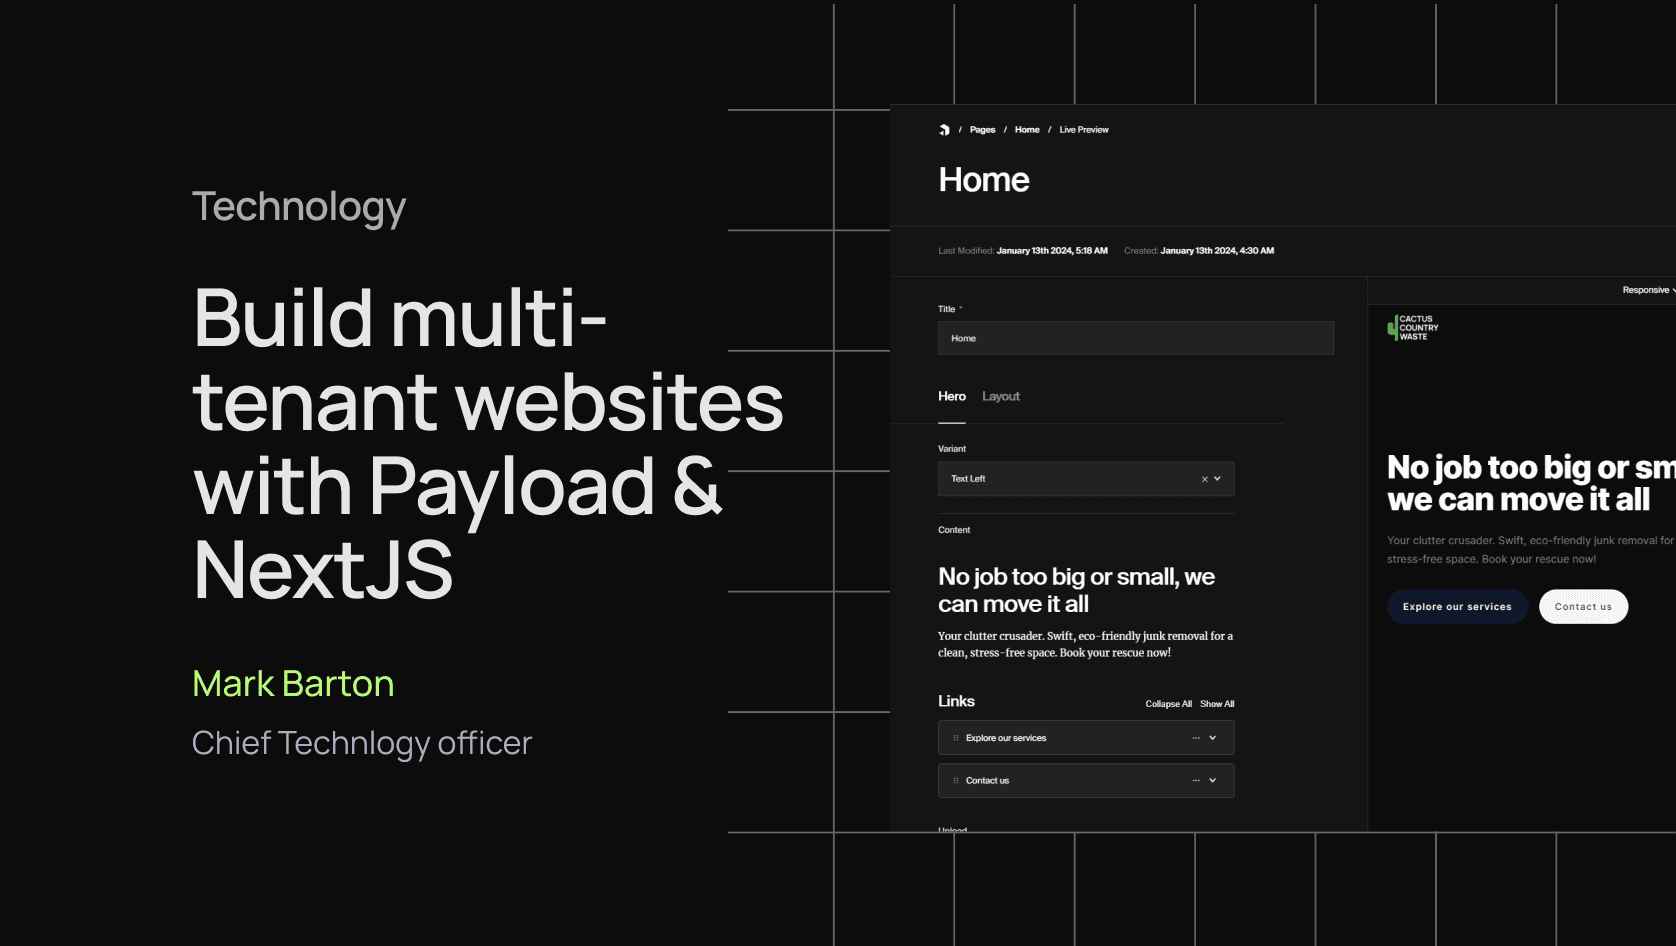
Build multi-tenant websites with Payload & NextJS
Introduction
PayloadCMS will soon be releasing their hotly anticipated 3.0 update. With this update comes a slew of improvements to the platform including, most notably, a full migration from ExpressJS over to NextJS.
Payload will be capable of deploying to Vercel with a single click, simplifying DevOps pipelines for web developers everywhere! Not to mention making it easier to build front-to-back applications with their easy to use API. So in this article, I'm going to be explaining how you can set up a multi-tenant web app using Payload V3, NextJS, and Vercel!
The goals of this tutorial is to have an instance of Payload controlling multiple applications. If you are not familiar with the concept of multi-tenancy, this tutorial strips it down to the basics. Fair warning, however, this tutorial is not production-ready, and I highly recommend pen-testing your application before onboarding clients. Additionally, you will need two separate apps in order to run this setup.
Setup
First, make sure you have Node 20 installed on your machine, then open a terminal window and create a new Payload v3 project with
npx create-payload-app@beta
I will be using MongoDB for this example, however, feel free to use whatever Database Provider you like.
Because of how PayloadCMS V3 is setup, I would recommend creating a separate NextJS app for your multi-tenant website frontends. You can do this by creating a new NextJS app with.
npx create-next-app@latest --typescript
Configuring Payload
Open your collections folder and add a new collection called Tenant. This collection will act as our top-level entity and will contain two `text` fields - name, and host:
-1.png)
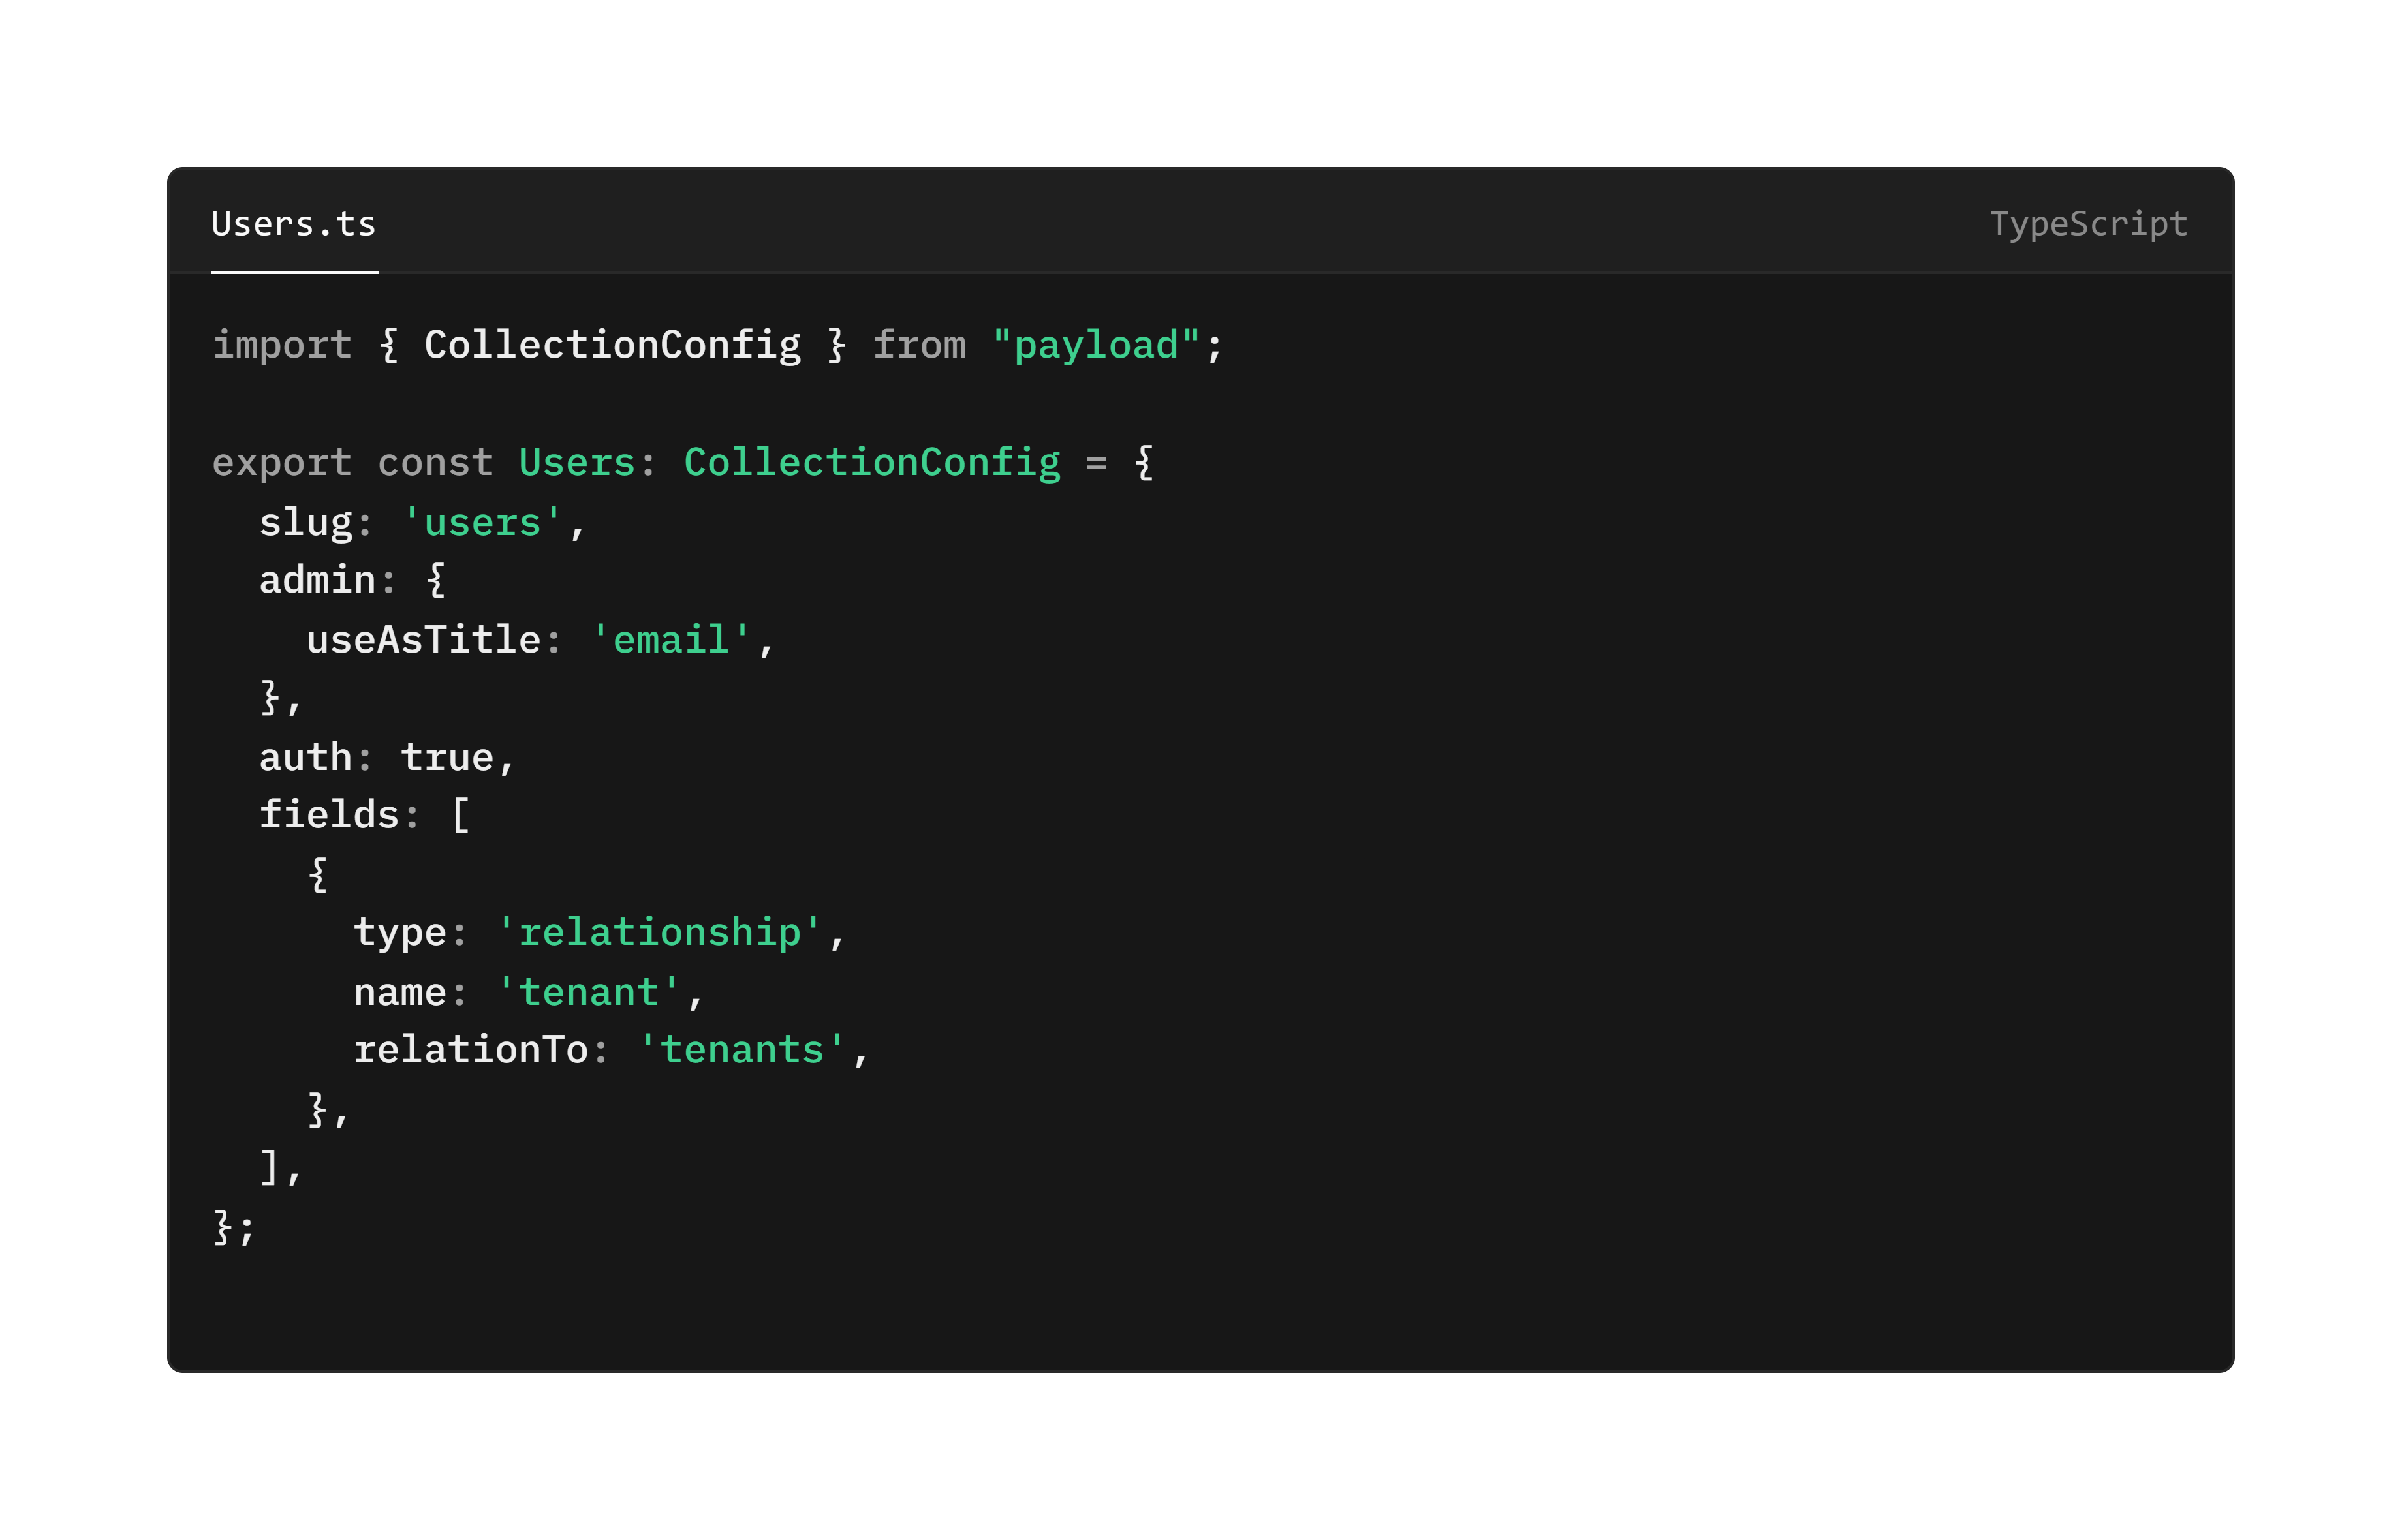
With this collection setup, open your User collection and add a relationship field to this tenant collection.
And finally, let's create a Pages collection that will act as the content for our website.
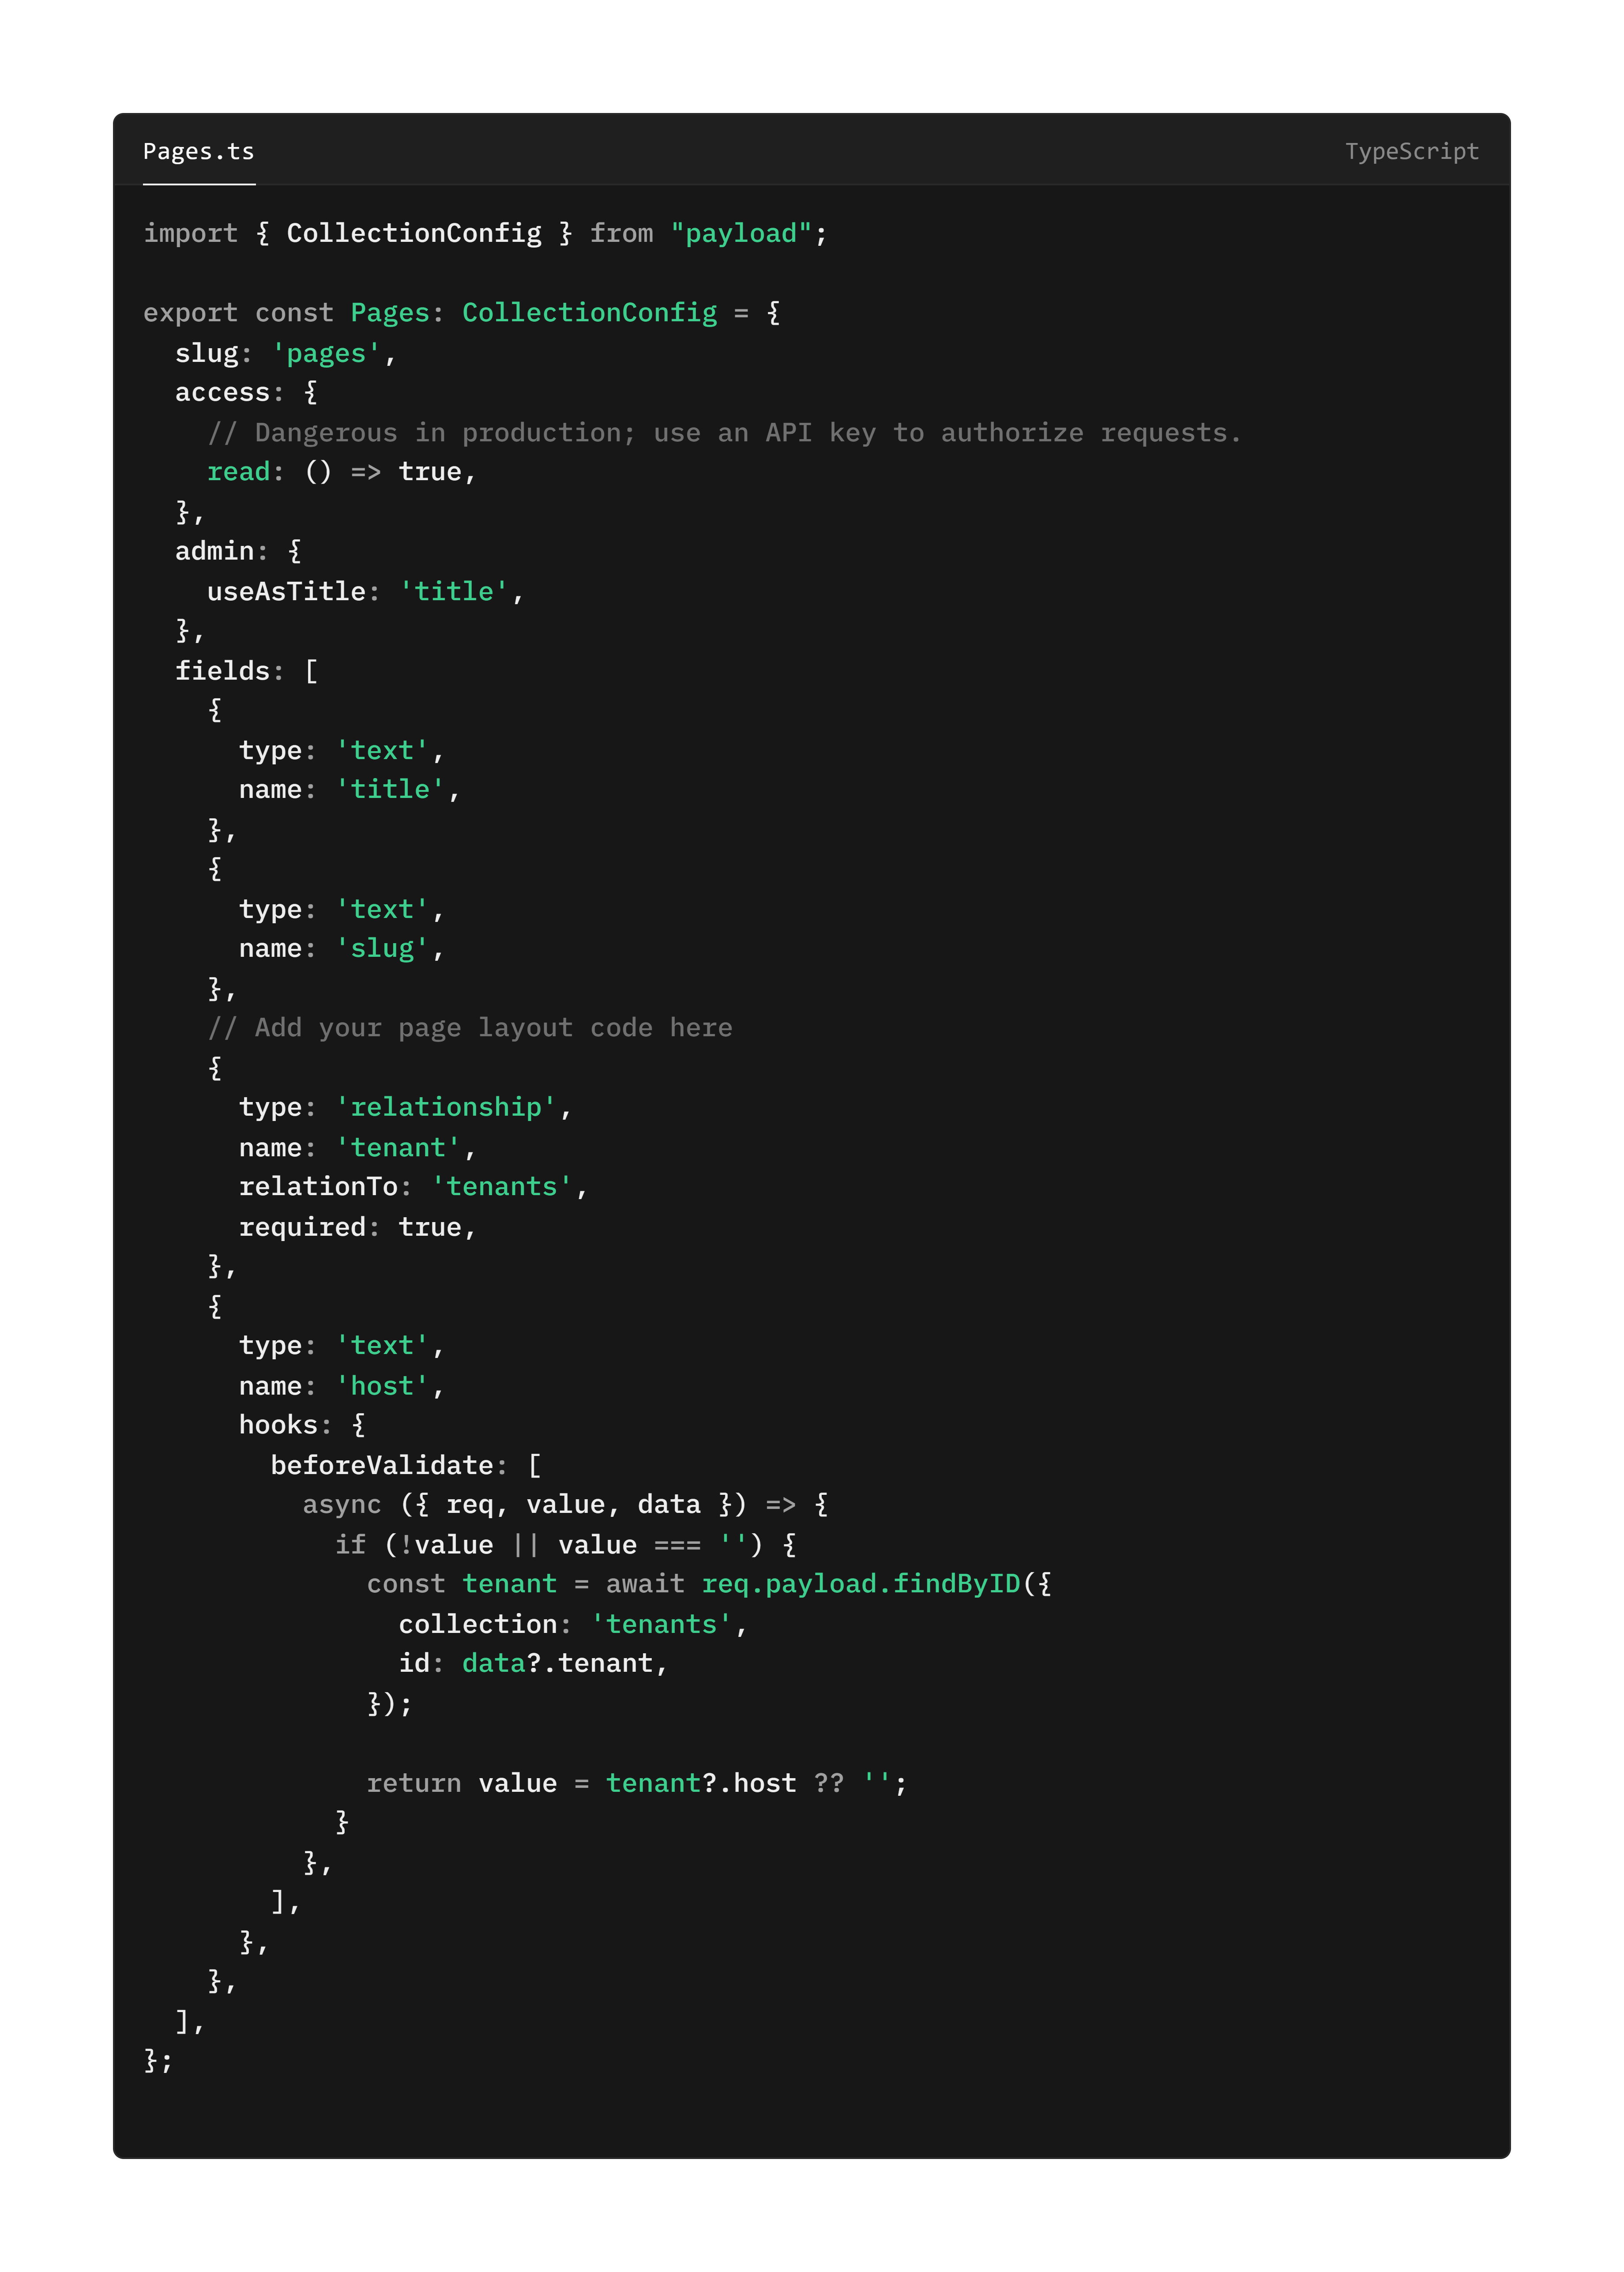
I've added an additional field called host. This field has a hook which automatically assigns the host of your page's tenant. We do this primarily due to a limitation in PayloadCMS which prevents us from deep-querying on relationships. With the host assigned on the page document, we can query for that host specifically on the frontend. This is only really necessary if you choose to use GraphQL (that's what I'm using for this tutorial).
Don't forget to register your Tenant & Pages collections in your Payload config! Otherwise your app will crash when you attempt to boot it.
collections: [Users, Pages, Tenants]
Start up your app to check everything has installed properly. Once it's booted up, create a new user and a couple new Tenants. You can assign Tenants to a user in the Users collection. You can also assign a host which is basically a url without the http:// or https://.
Configuring NextJS
This next bit is a little bit weird, so bear with me. NextJS uses a file-based routing system. What this means is the folders in the app directory dictate what routes NextJS can navigate to. There are lots of ways to configuring your routes, from completely static, all the way to deeply nested dynamic routes.
Our application is going to use a dynamic route, that means a route with square brackets [] around it. These brackets tell NextJS that this route takes a parameter that can be passed down to Layouts, Pages, Modals, etc... However there is no way currently for NextJS to know that [host] is meant to refer to the host in our Tenants collection. That's where Middleware will help us.
In your src directory (IMPORTANT, NOT APP) create a new file called middleware.ts. In this file, enter the following code:
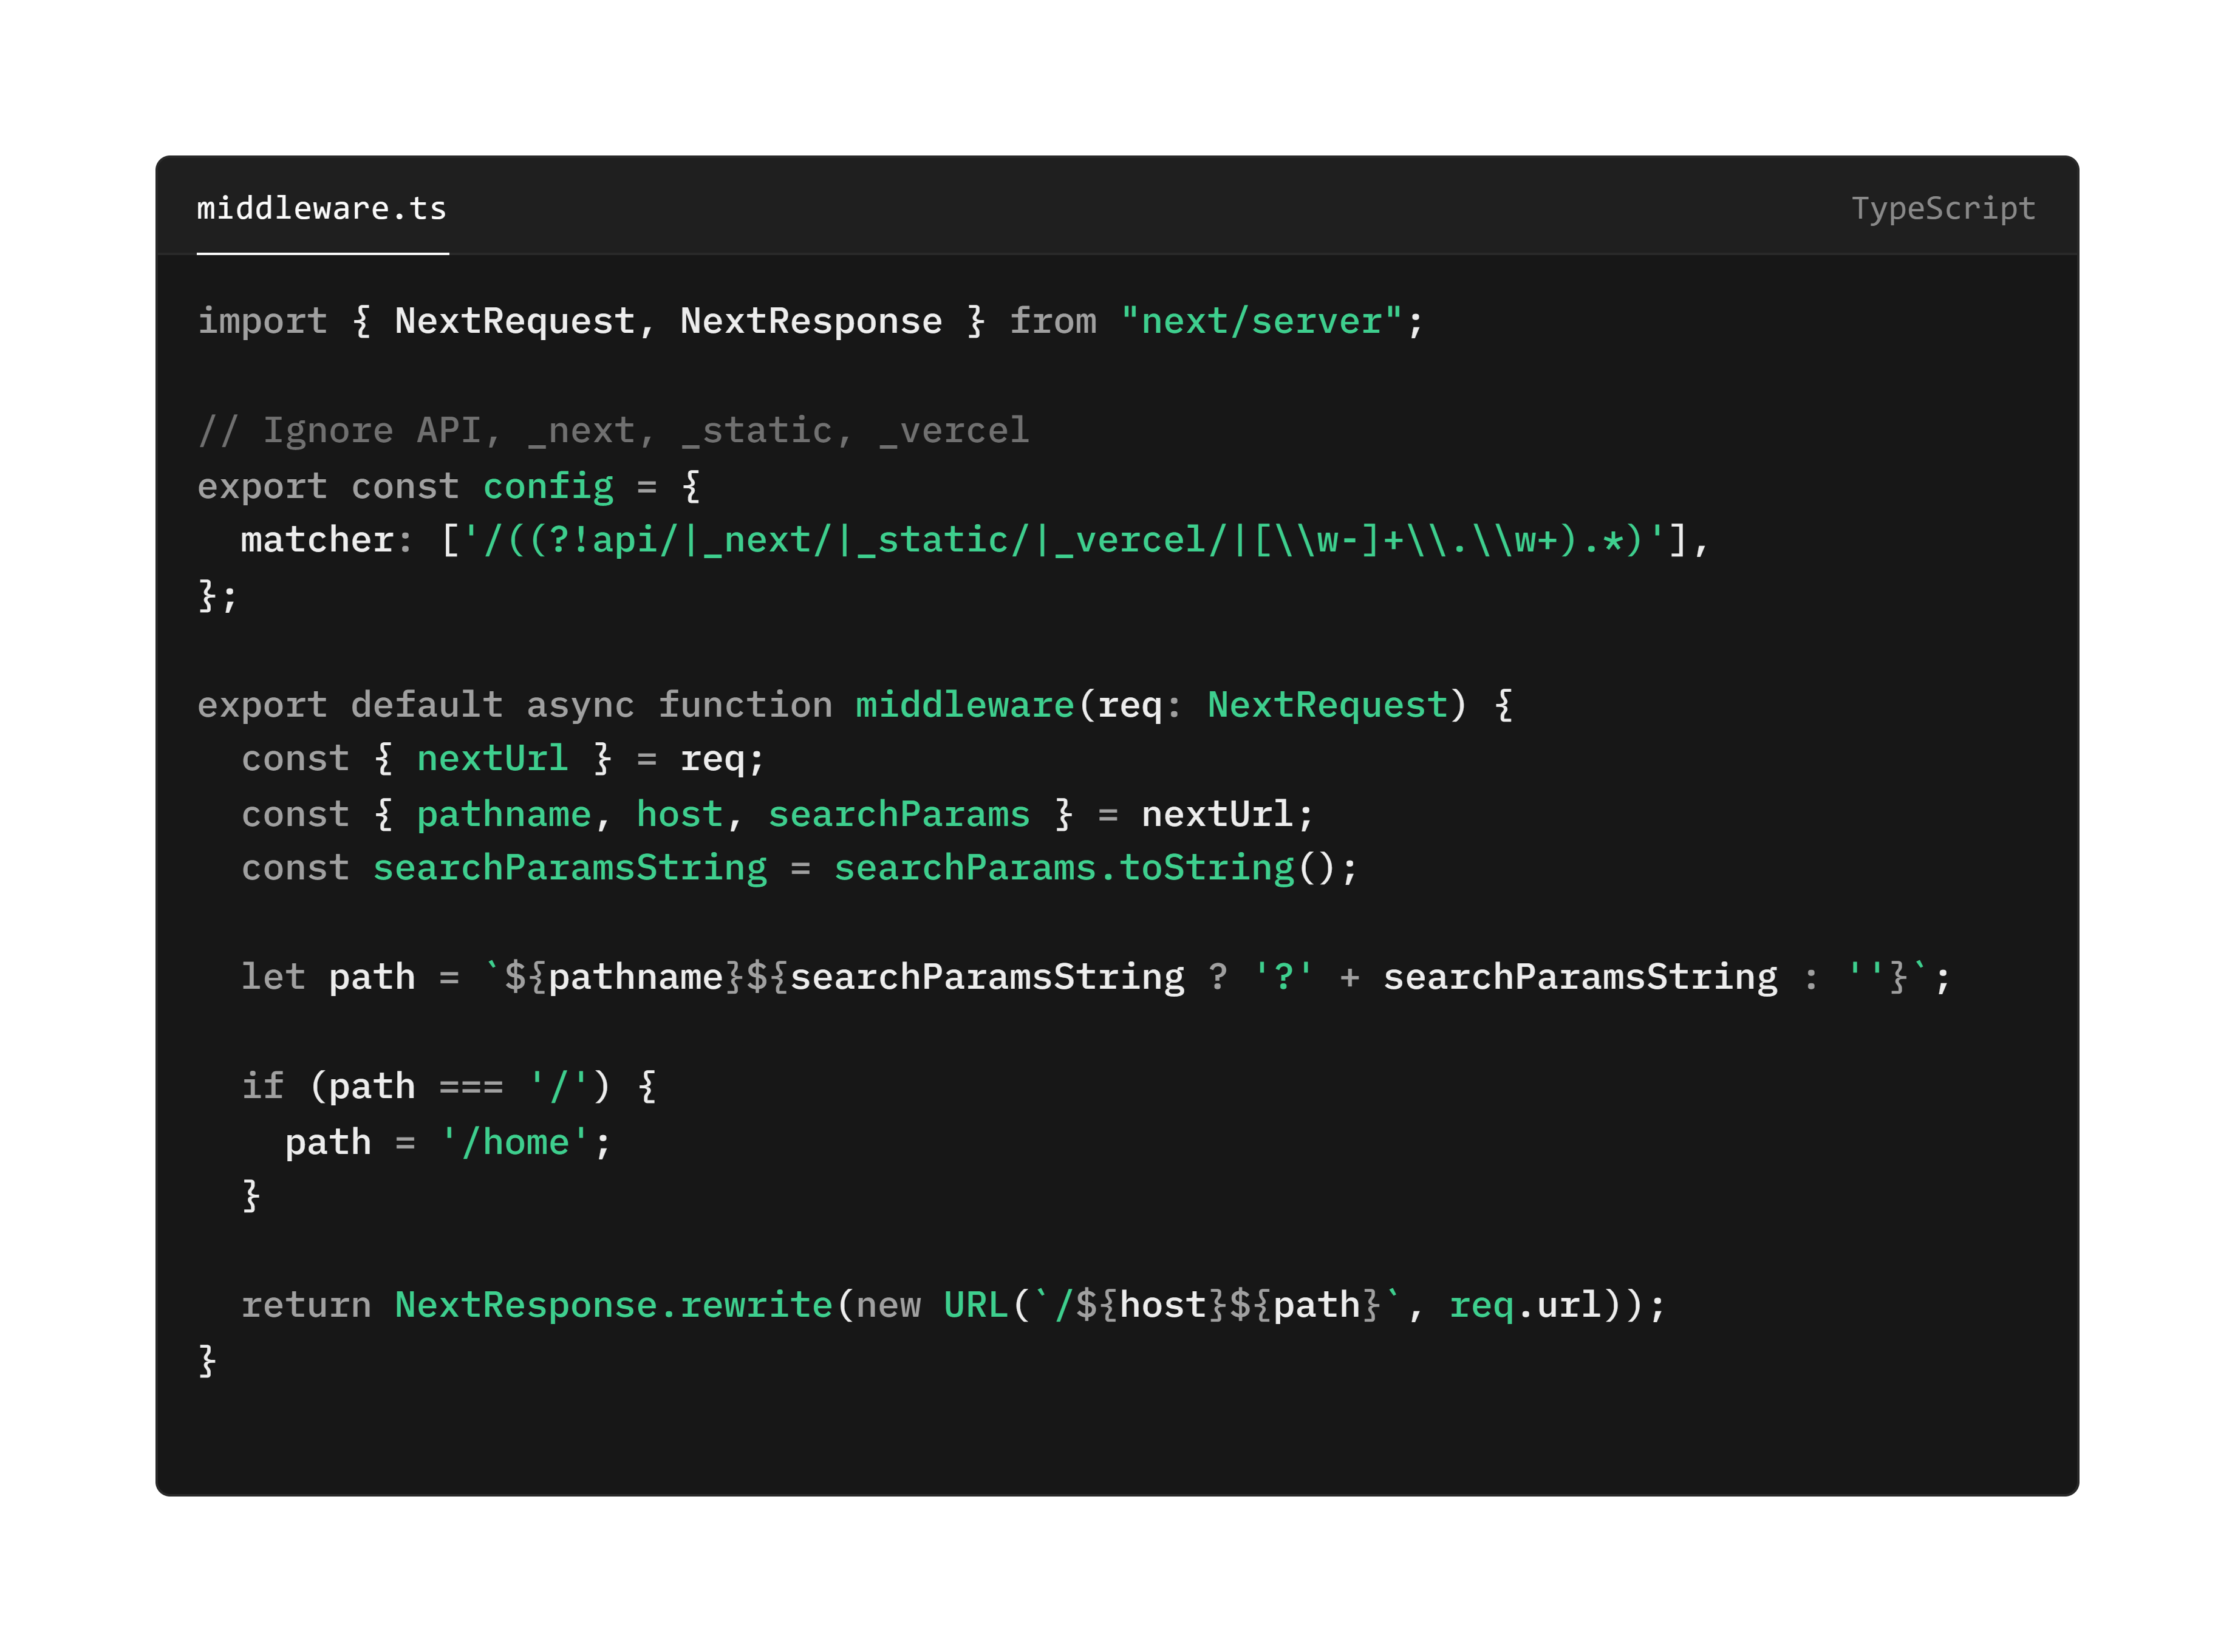
All we're really doing is handling the routing for the request based on its host. So if someone enters we grab my-website.com from the nextURL and contact the path. We'll then rewrite the request to point to our dynamic app routes.
The App Folder
As I mentioned earlier, the app folder requires a dynamic route called [host]. This is going to act as the new entrypoint for our website. We're going to have dynamic pages on our website, so add a [...slug] route within the [host] folder. Then, inside of the [slug] folder add a page.tsx file. This file is where all of your regular logic will live. So if you wish to add generateStaticParams or generateMetadata, you would do it from this file!
Now the question is how to load your webpage content? NextJS passes params down to the default Page function of each route. What you maybe didn't realise is that this doesn't just happen at one level. NextJS passes route params from each dynamic route the Page.tsx file is a child of. This means we can grab the host & page slug using the following code:
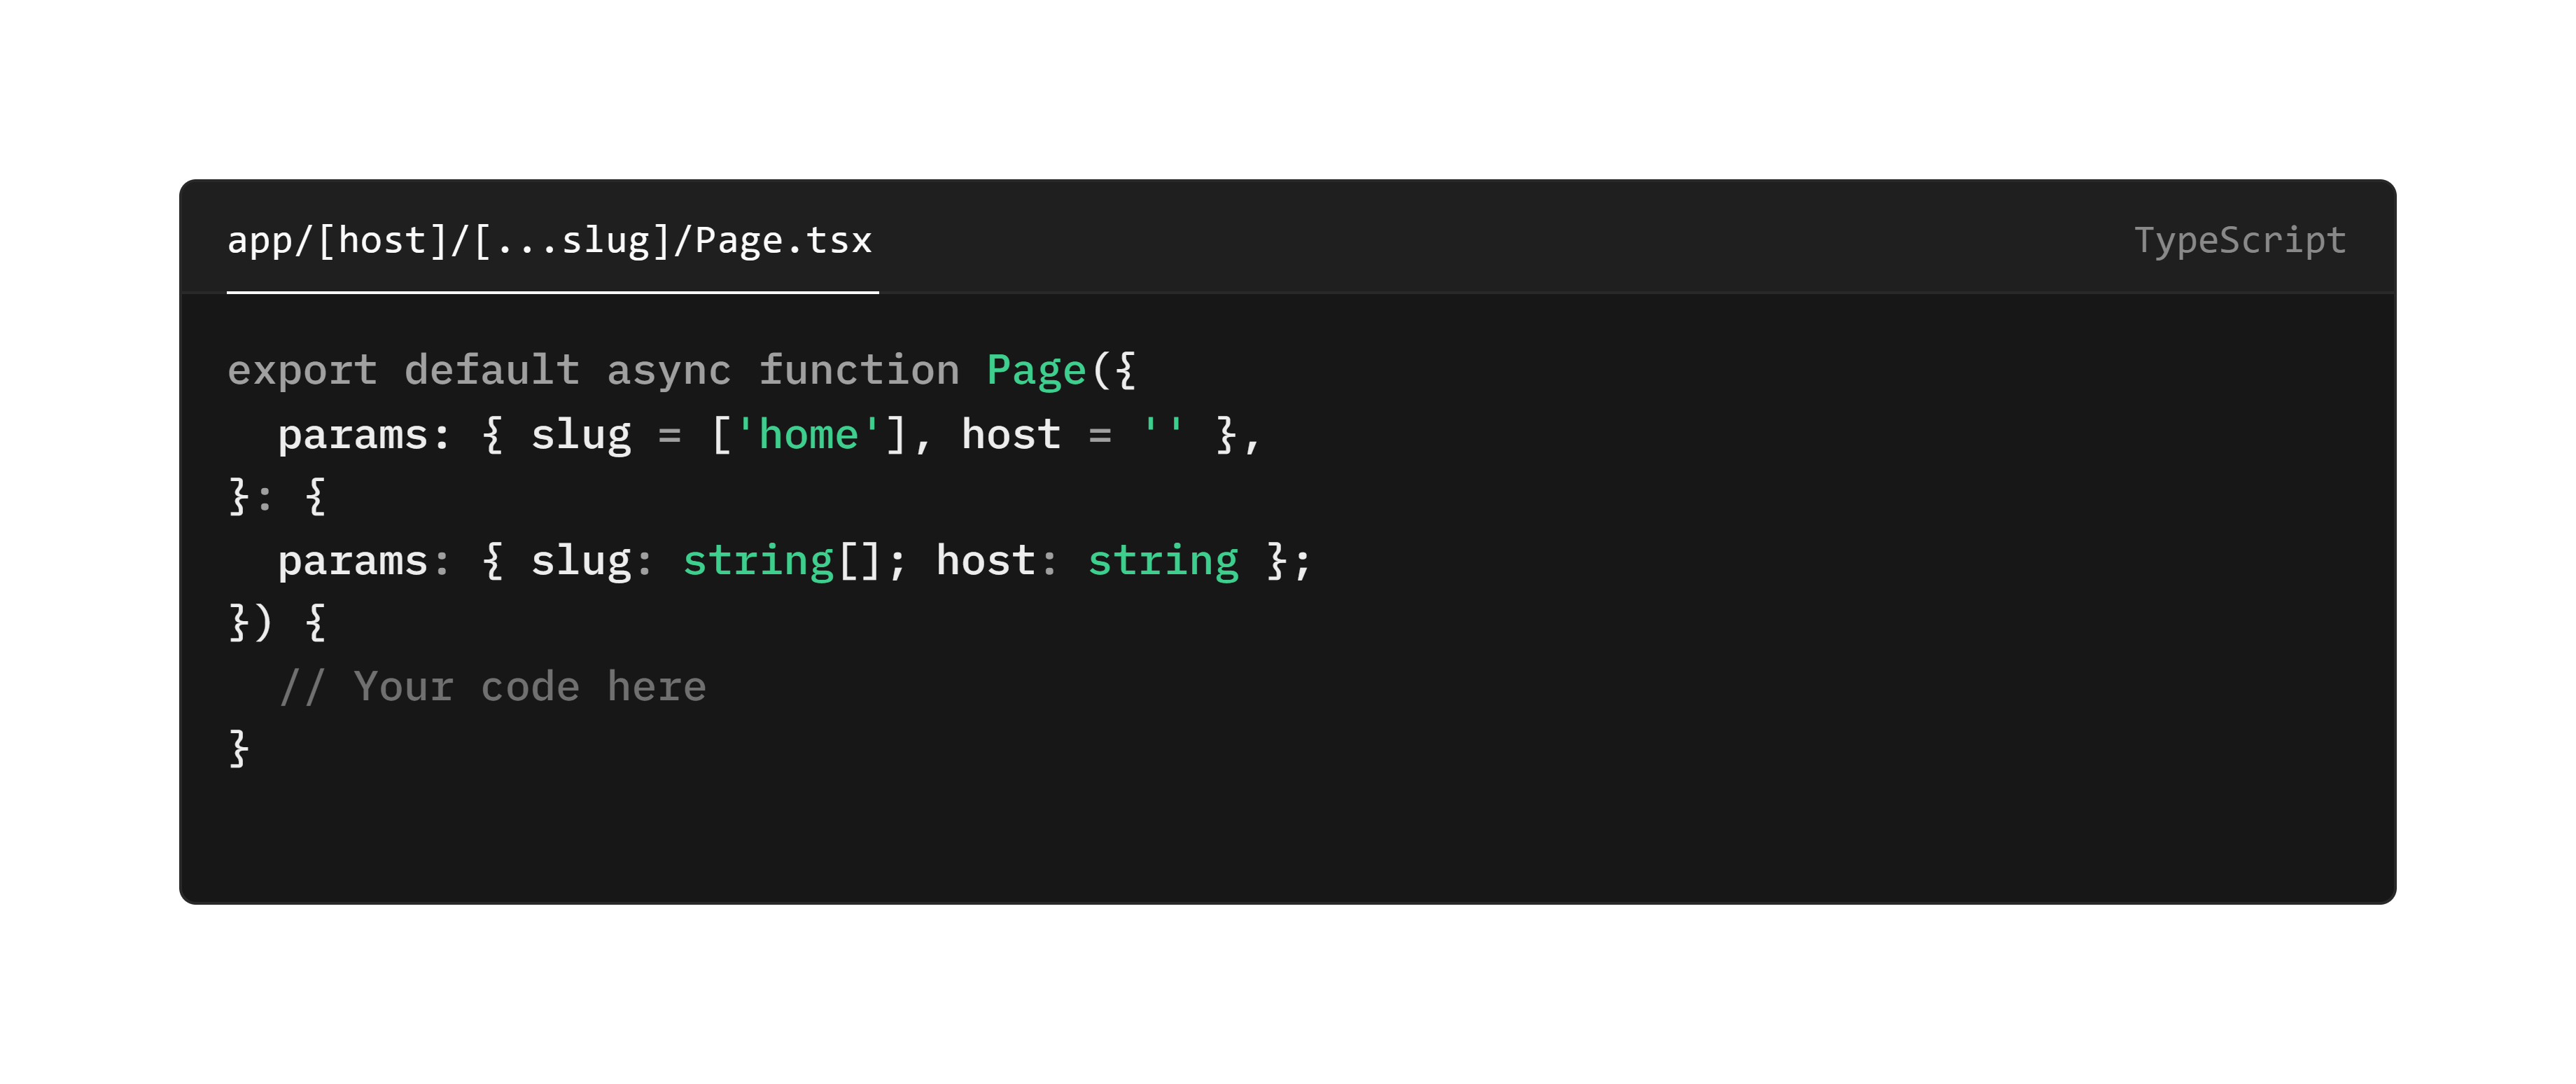
We can then use the slug & host and pass that into our pages fetch request! Here is what a GraphQL query might look like:
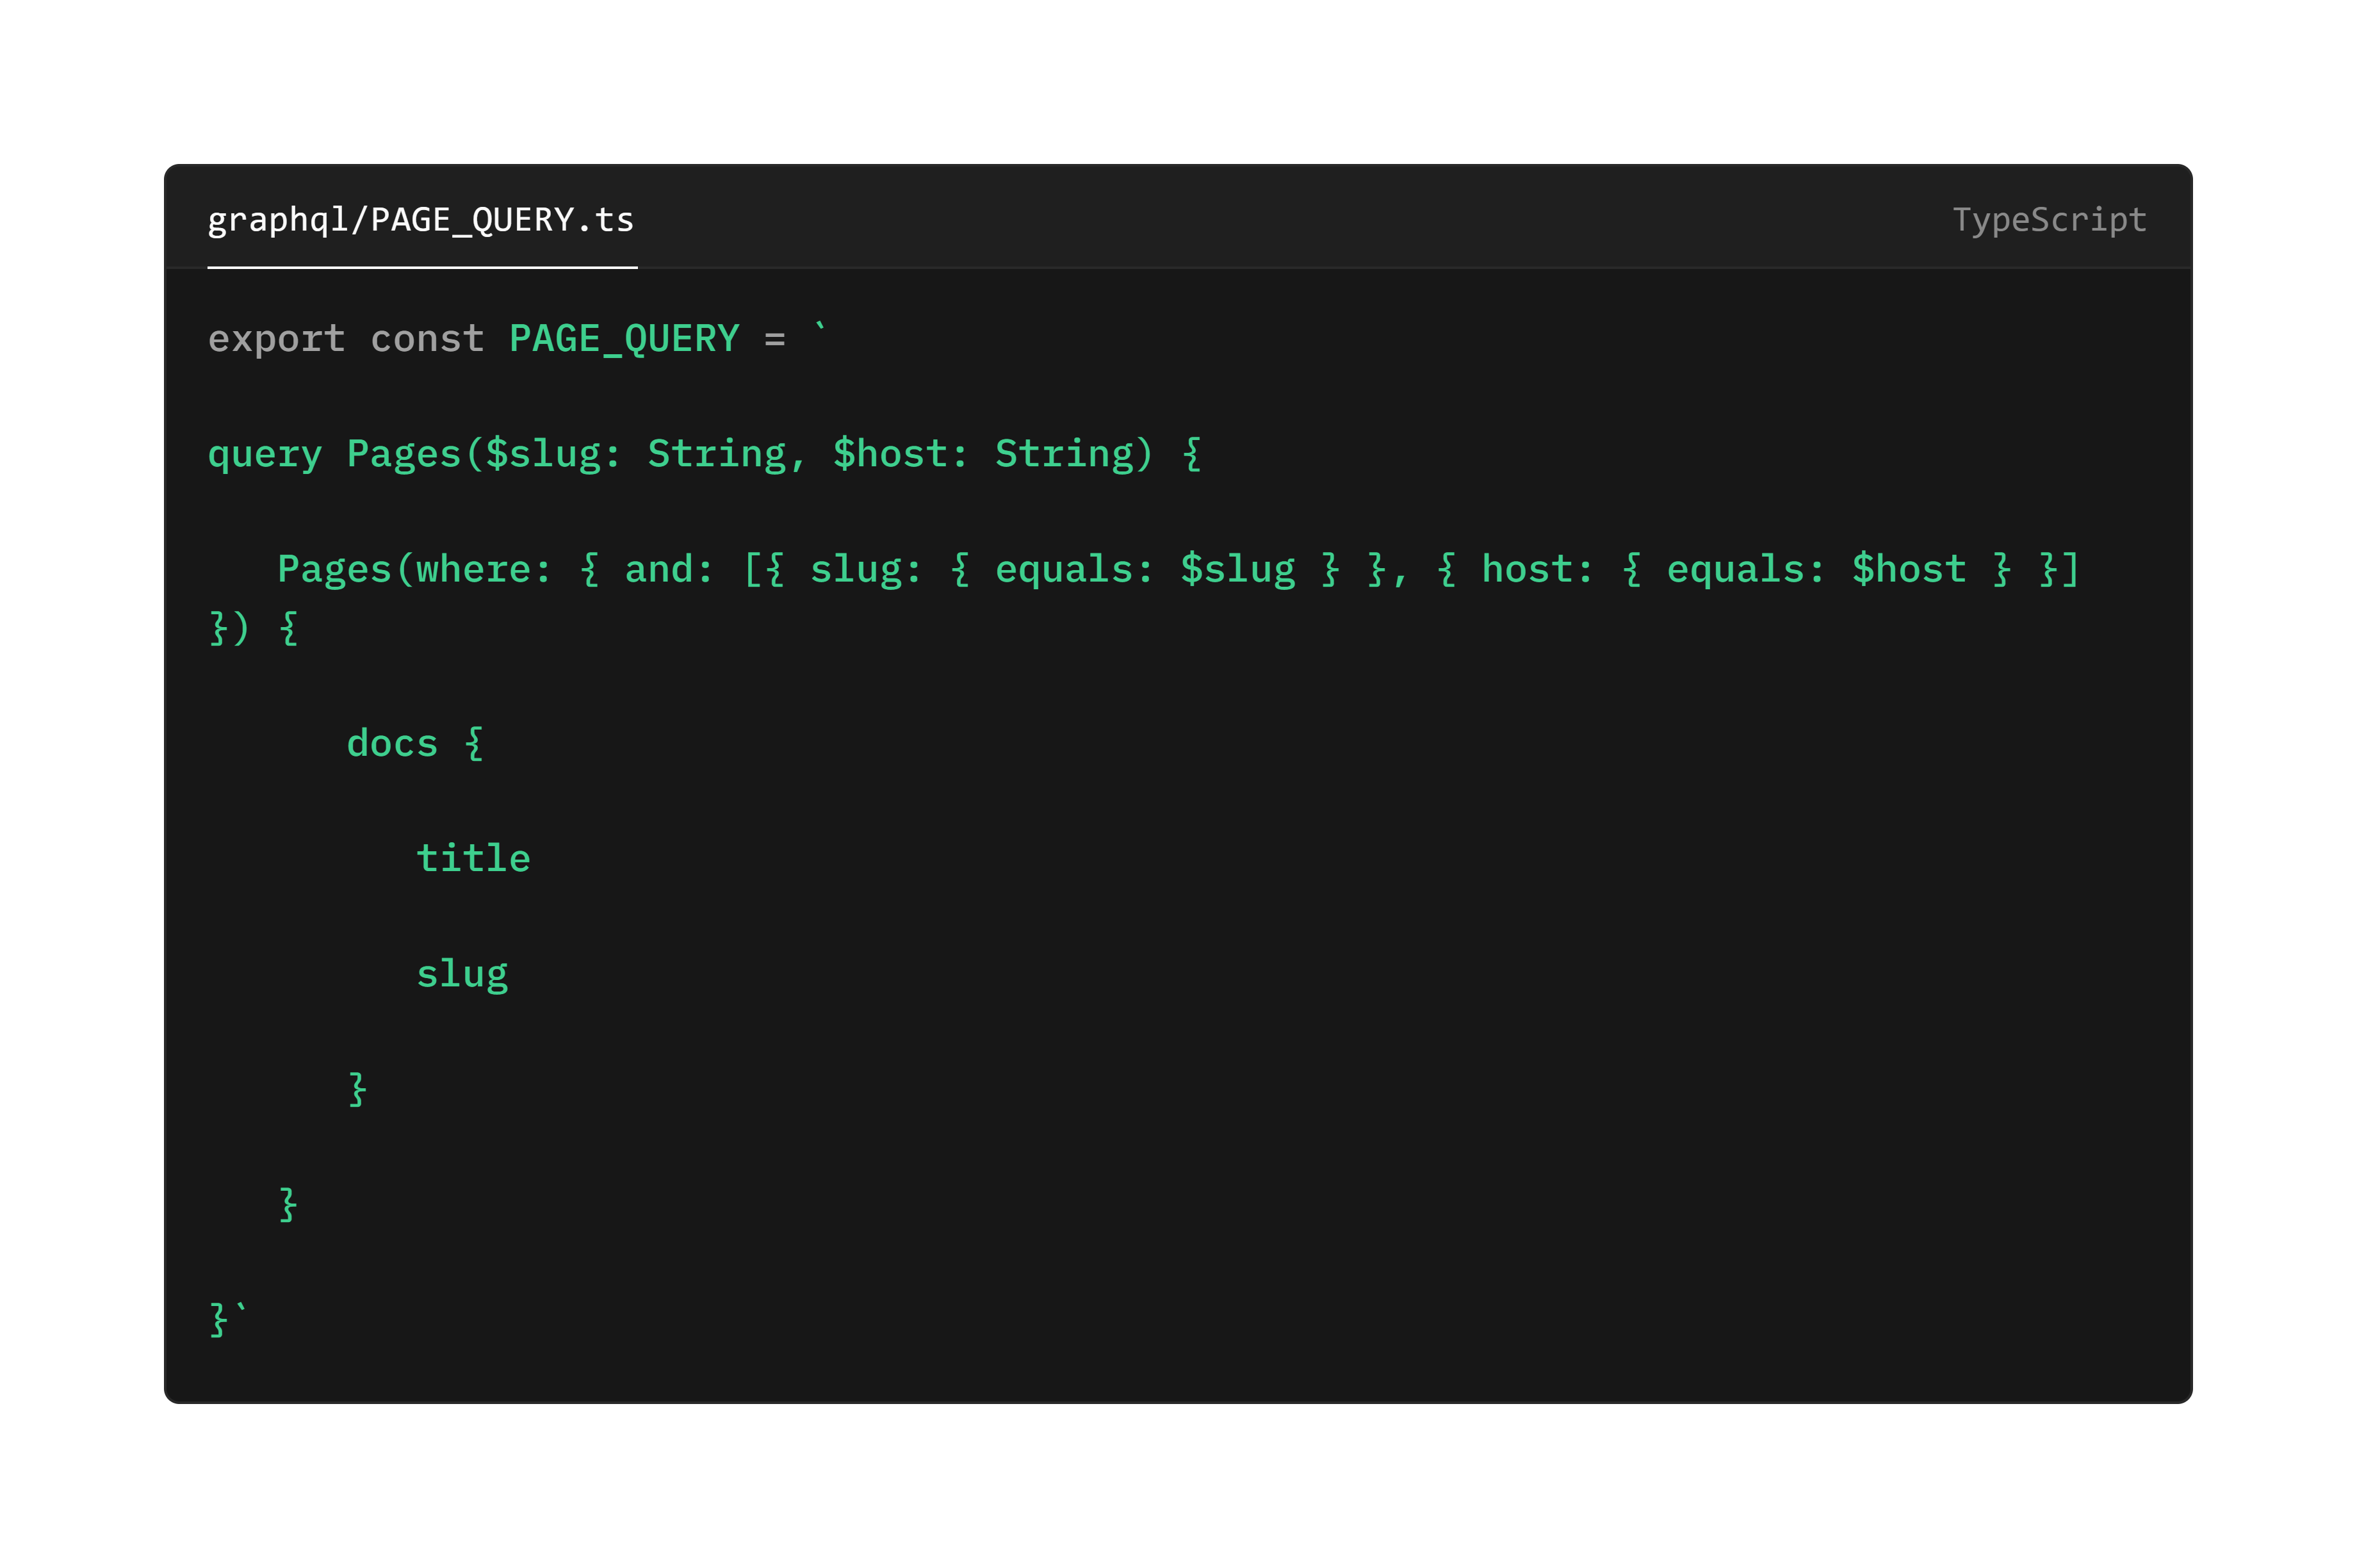
And then in your Page.tsx file you would pass the params into your request:
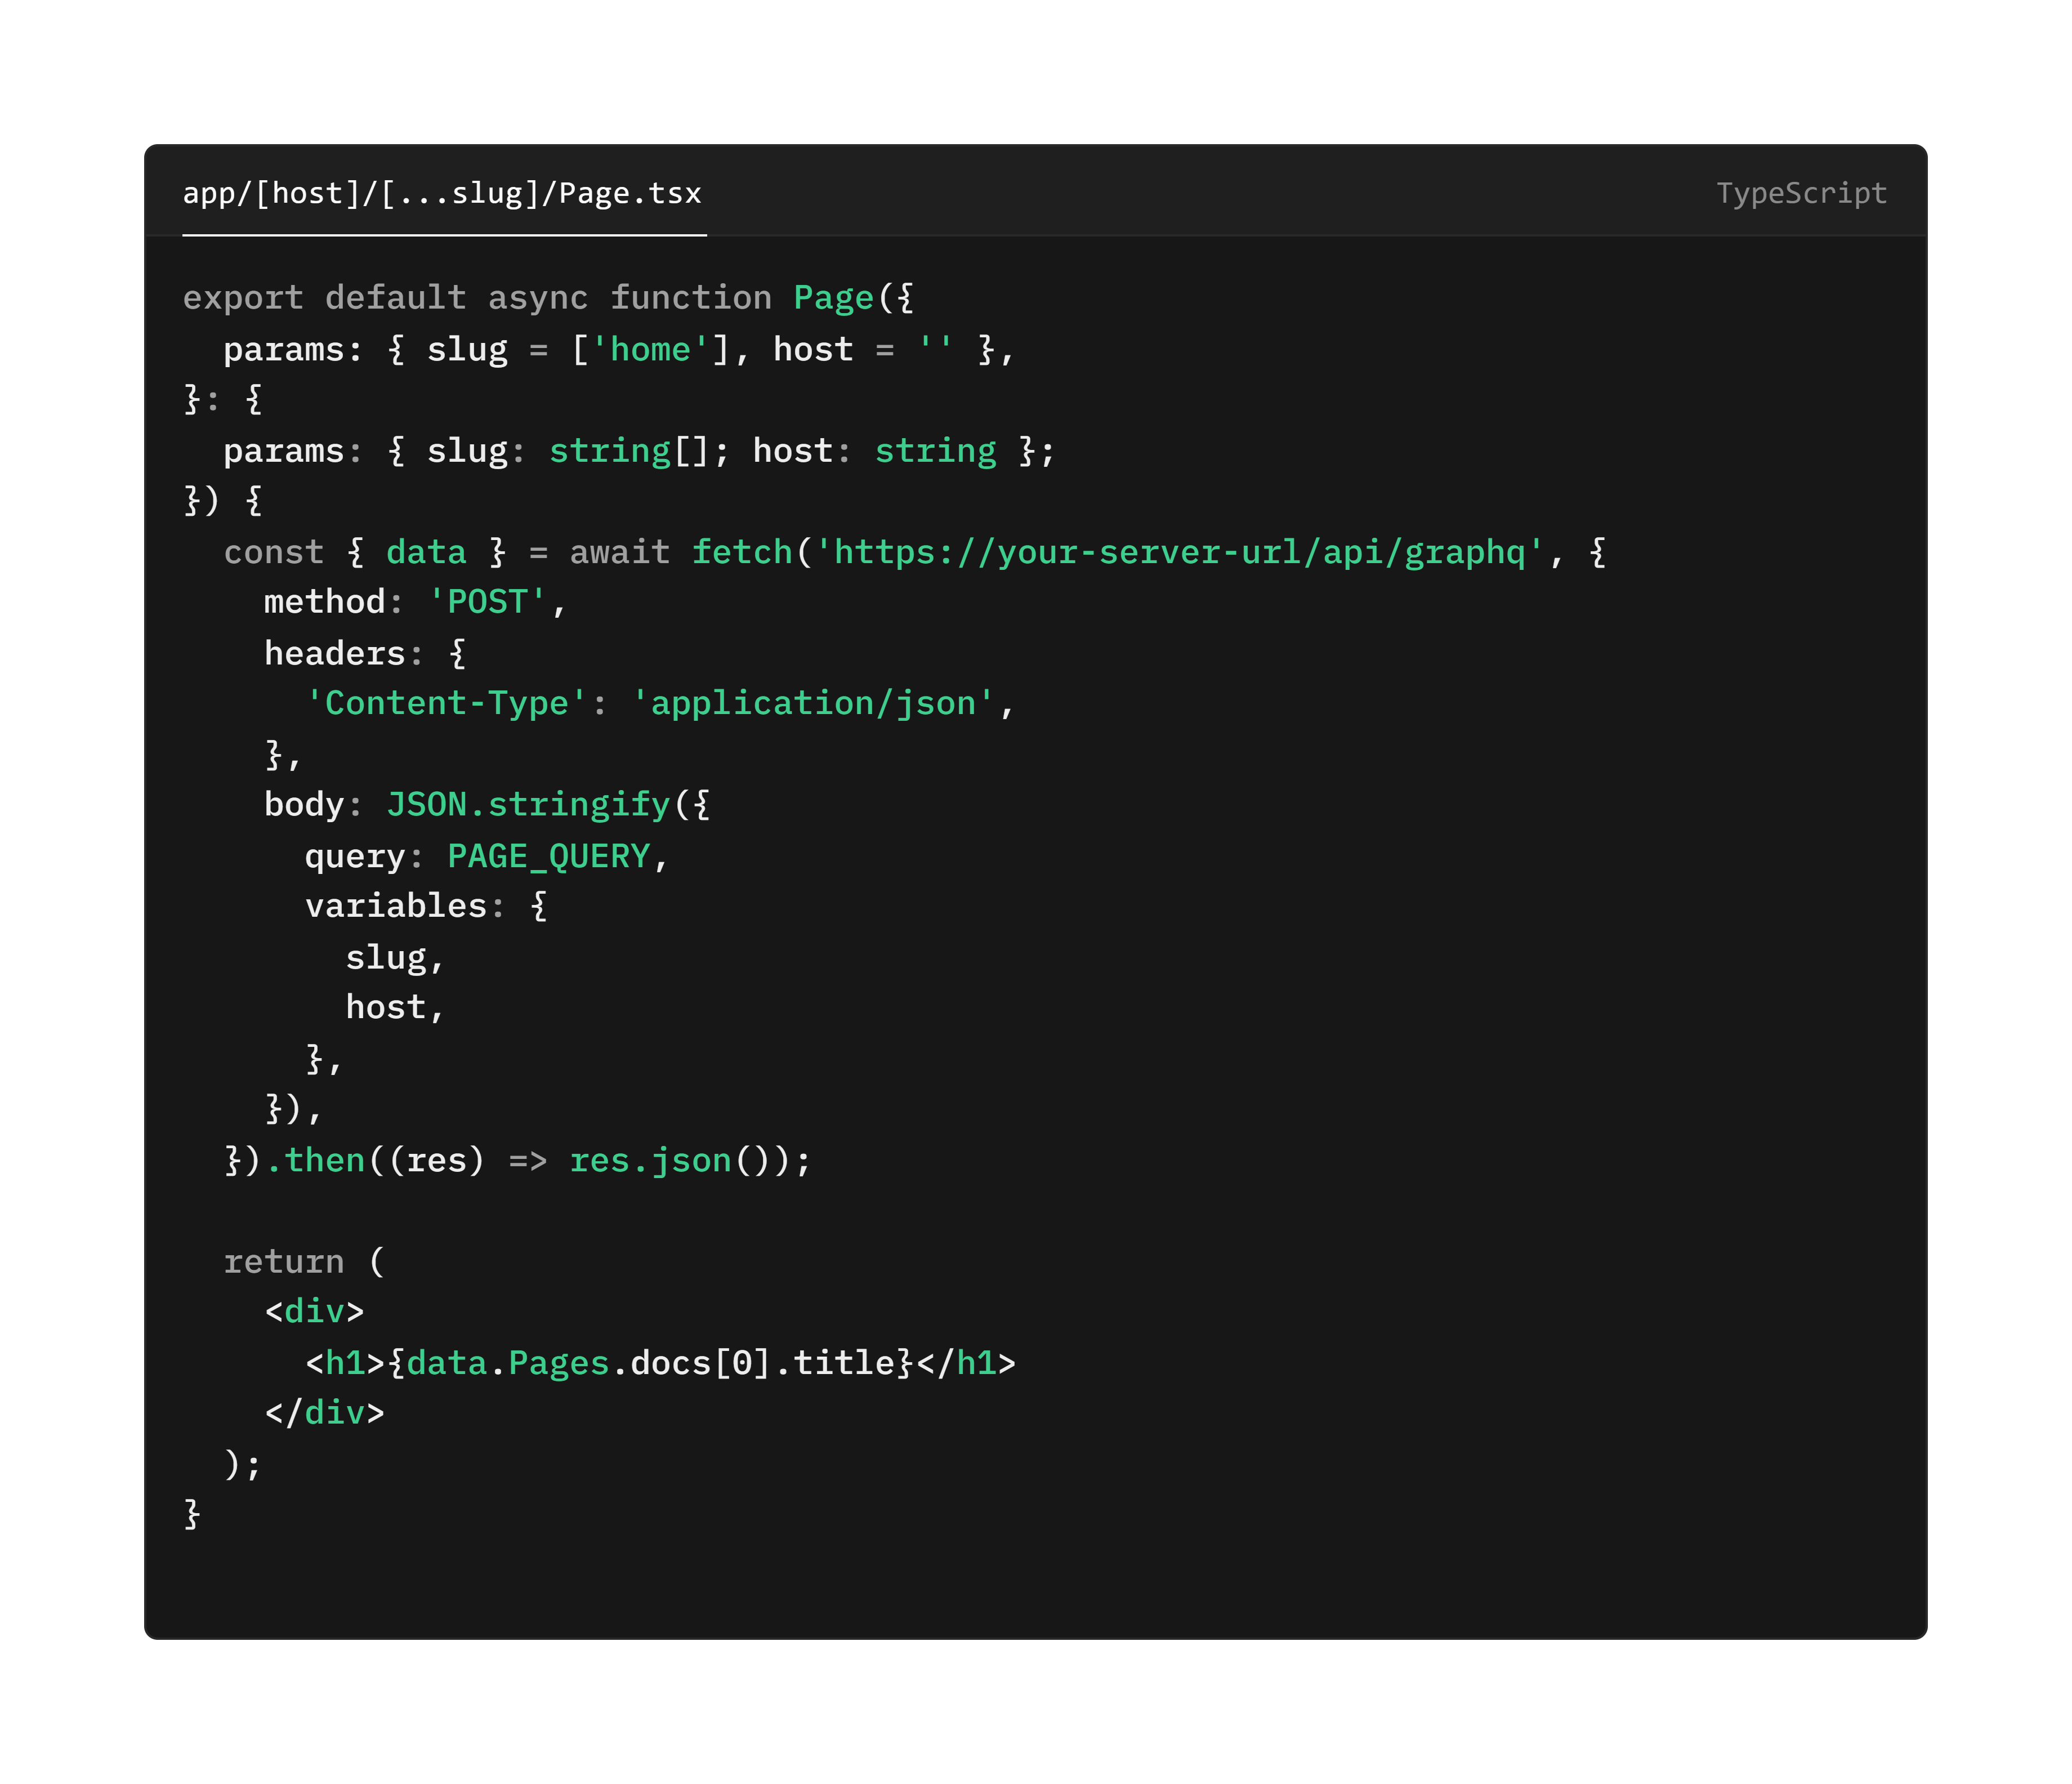
And that's it! If you wish to test this out properly, you'll need to have a couple domains. You can get free domain names from providers like or, alternatively, you can use subdomains on a domain that you already own.