
Deploying a Payload CMS Instance with Docker & Google Cloud Run
Introduction
If you've worked with OMNIUX before, you'll know we are obsessed with Payload CMS. Not only does Payload allow us to ship fast and beautiful websites for our clients, but it also gives us the freedom to extend the platform for our client's needs. Payload is Headless, meaning it can be used independently from a front-end framework. It also means we can deploy it to a provider of our choice. At OMNIUX, we like our cloud architecture to be fast, scalable, and cost-effective, so we use Google Cloud as our primary cloud service provider,
Why Google Cloud?
There are a lot of different cloud service providers out there. From Digital Ocean to Amazon Web Services - it can be difficult finding a provider that is right for you. We chose Google Cloud Services due to their generous free allowance, their developer-friendly documentation, and their commitment to running on 100% renewable energy. Google Cloud Run, the platform we use to deploy our Payload Instances, allows for 2 million free invocations per month. This is more than enough for our use case and, with a single instance, we rarely use up our allocation. This keeps our costs low (around $2-4 a month) with no performance degradation.
Google offers a generous free tier for most of the services we use. If you wish to calculate your potential costs, you can use this price calculator. We have pre-populated it with all of the services used for this tutorial. As you can see, this base line will allow you to deploy on Google Cloud for FREE.
Getting Started
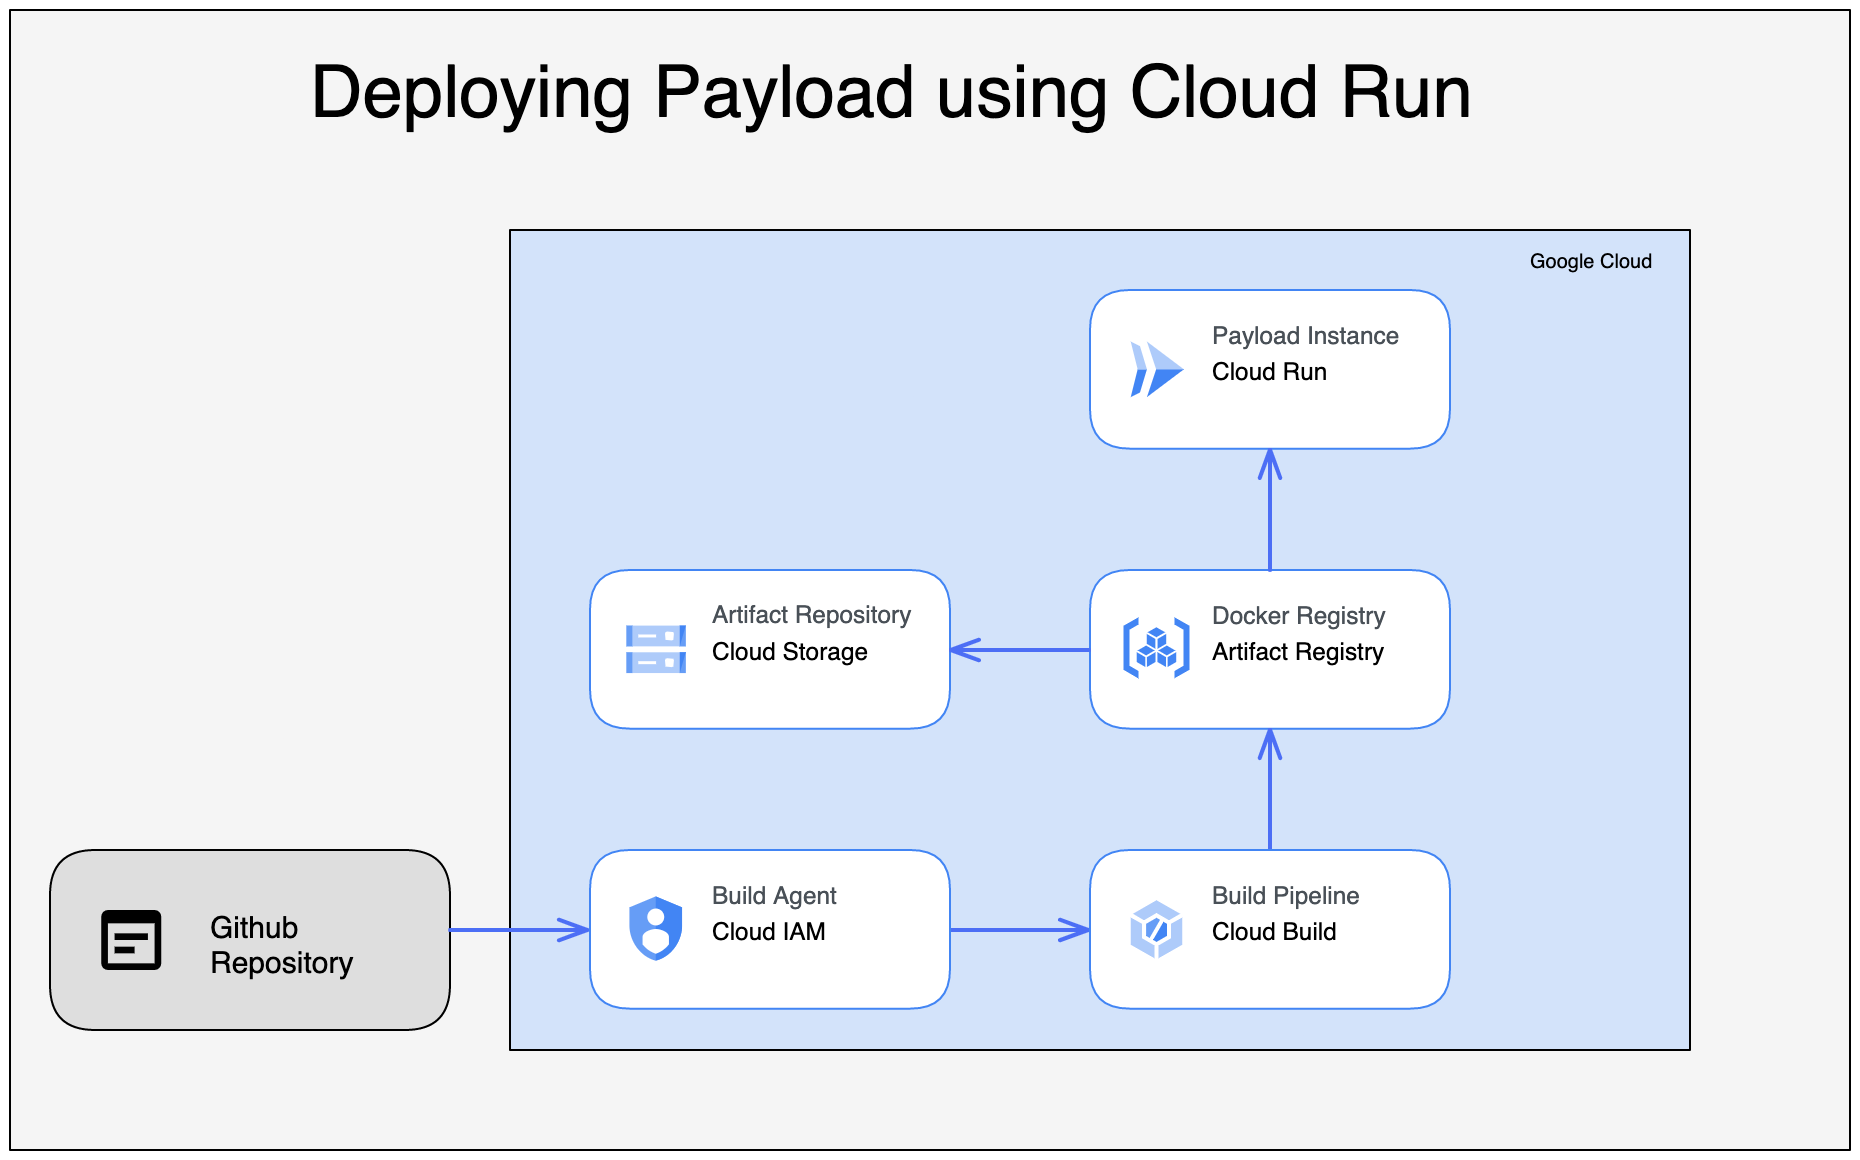
In order to deploy on Google Cloud there are a couple of things you'll need. First, you'll need an account with Google Cloud. Once you've set up an account you'll need to create a new project. This can be called whatever you like. You'll also need a GitHub Repository, ideally one with your PayloadCMS code readily available as this will be used to kickstart the CI/CD Pipeline.With your Google project all setup, you'll be greeted with a welcome screen with a ton of services. This can all get pretty overwhelming because Google offers lots of individual services (over 70 at the time of writing!), but for now, we're going to focus on 4 services;
We are going to combine these services into a CI/CD pipeline - allowing us to deploy our Payload Apps via a GitHub Repository seamlessly.
How Does This Work?
We are going to containerize our Payload app using Docker. We do this in Cloud Build, generating a new Docker image and pushing it to Artifact Registry. Artifact Registry stores our latest images in a Cloud Storage Bucket. We retrieve our latest image in Cloud Run when a new container instance is "spun up". The main benefit of Dockerizing our app is that if we decide we want to move to another Cloud Provider (Like AWS) we don't need to write any platform-specific code. Our Payload app will deploy and run just like it does on Google.
Configuring the Build Trigger
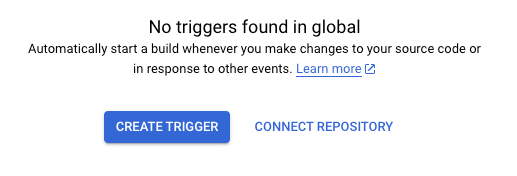
Head over to the Cloud Build page. You'll find yourself on the History tab with two options; Run Sample Build and Create Trigger. We're going to press Create Trigger

Once you've connected your repo, create your trigger and you'll be taken to the Create Trigger page.
This page is where we set up the stages of our Trigger. You can leave most of the options in their default state (feel free to change your desired build event, such as pushing to a specific branch or opening a Pull Request). Most importantly, however, we want to change our Configuration slightly. Scroll down to the Configuration section and choose Cloud Build configuration file (yaml or json).
Also remember to set your Cloud Build configuration file location to /deployment.yaml. Cloud Build will look for your yaml file from the root of your repository. So if your deployment.yaml file is in a folder called "cms" - your file location should say cms/deployment.yaml.
Configuring the Build Agent
We need to configure a special Service Account called a Build Agent in order to build and deploy a project. A Build Agent is an automated service worker that has strict access to resources in Google Cloud. Google creates this account for us, however, we still need to add a few extra permissions in order to allow it access to other services such as Cloud Run.
On the Cloud Build Page, navigate to the Settings Panel. This will bring up a list of Service Account Permissions. Make sure that the Cloud Run, Service Accounts, and Cloud Build options are enabled.

Additionally, we need to add an extra permission to the Build Agent in order to allow Logging build steps and errors. Navigate to IAM & Admin and click the edit button next to the cloudbuild.gserviceaccount.com account. Add the Cloud Build Logging Service Account role and then Save your changes.

Docker Setup
Now that our Trigger has been configured, let's configure the Docker image. Head over to your code and create a file at the same level as your package.json. Call it Dockerfile and paste the following code inside:

If you're a pro at Docker you probably know what's going on. If you're new, however, this might all seem a bit overwhelming. In a nutshell, we are telling Docker to download the necessary packages using Yarn. Then we build the project and set the environment to Production. The build process creates a folder called dist. This folder contains all the files needed to run Payload standalone. With these files created, we move them to a specific folder inside our Docker container and then run the server on port .
This code should be enough to get your app running locally on your machine using Docker. Give it a try and tweak whatever is needed. If you use npm you may want to replace "yarn" with "npm" so as not to mix package managers.
Cloud Build YAML Setup
Lastly, we need to create a new Cloud Build file called "deployment.yaml" at the same level as the DockerFile. This file is what Google Cloud uses in order to build and deploy our app on Google Cloud Run. It is picked up by our build trigger and managed by the build agent.
The Cloud Build file is split into 3 sections:
- Docker Build
- Docker Push
- Google Cloud Deploy
Add the following code into your deployment.yaml file;

Most of the hard work is done for you by the pre-built Cloud Run tasks. However, you may need to update the image location with your Artifact repository. In order to create one, navigate to Artifact Registry and click Create Repository.
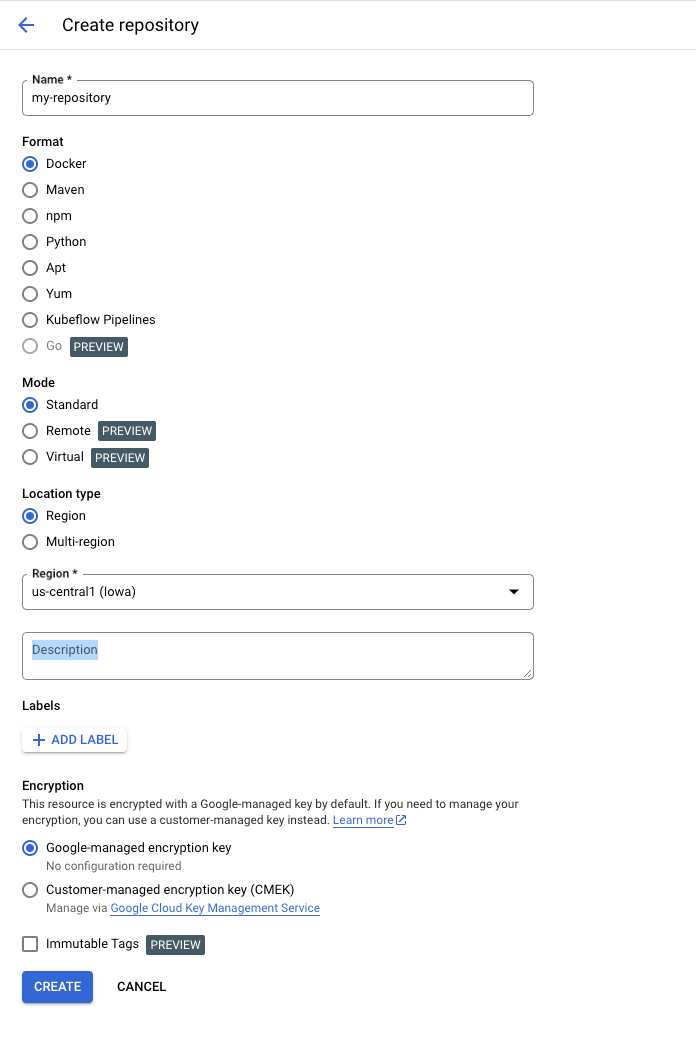
Give your Repository a name and select a region (We selected us-central1 (Iowa)). Save your Repository and then update the values in the build.yaml file.
You should not need to change any of the other values used in this file unless you know what you are doing. For instance, the arguments in the first stage tell Google Cloud to use the Build command with some additional Docker arguments such as tag and file location. This allows for more customization depending on your project's needs.
Putting it All Together
With all of this code added to your project, push your changes to GitHub and watch the project build but ultimately fail. If the project is built but the Run stage fails, don't panic! It's probably caused by the environment variables we added in the Run stage of the Cloud Build file.
The values we passed aren't actually reaching the Cloud Run container yet. So in order to fix this, open Cloud Run in the Google Cloud Console and navigate to your Instance (we called ours CMS) and click Edit & Deploy New Revision. In this new screen, scroll down to Environment Variables and create two new variables based on the ones we added to the Cloud Build file.
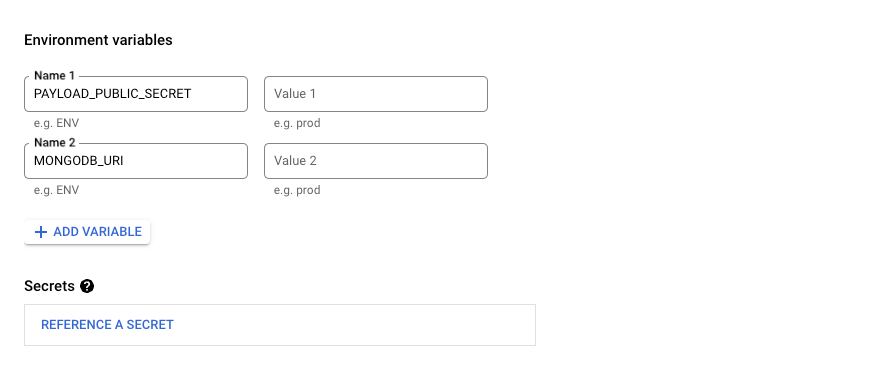
Add in these variables and then save your changes, the container will attempt to re-run, eventually spinning up and showing all green signals. The very last thing to do now is to make your instance publicly accessible.
Navigate to the Security tab and enable Allow unauthenticated invocations. Your Payload instance will now be accessible on the public internet. Congratulations, your Continuous Deployment Pipeline is now complete. Just click on the automatically generated URL and your Payload login screen will be waiting for you.
Summary
That was quite a lot to take in, but now that your instance is up and running, all you need to do is push changes to you GitHub repository in order to deploy them to Google Cloud Run. It takes a little bit of time to set up, but the payoff is definitely worth it.
If you found this article useful, let us know! OMNIUX are active in the Payload Discord Group. Share your thoughts with the team.